Introduction
If I made a list of my ten favorite aircraft, the C-130 Hercules
would appear somewhere in that list. It is basically a railroad
boxcar with wings, a huge tail, and a funny shaped nose, but I like
it.
Back in the 1980s, I had already zeroed in on 1/48th scale as
my scale of choice. As such, I was very happy when Testor / Italeri
released a 1/48th scale C-130E, the classic cargo version of the
Hercules. They also released an AC-130A Spectre, but discussion of
that model can wait for another time.
I wasted no time picking up a few C-130 kits right after they were
released in the middle 1980s. The local toy store near my house got
a shipment and priced them at only $26.95 each. I swear this must
have been a mis-pricing, but I was not going to complain. The model,
today, is only available from Italeri and runs in the $70 to $80
range.
In the years between 1985 and 1988, I built no less than four of
these massive kits. All but one were built as contract jobs for
people that crewed or worked on the C-130. This model was my second
build of the kit, and it was the one that was intended to be for me.
I ended up selling it to another C-130 crew person for $100 plus a
guided tour of the C-130 flight line at an airbase near my home. I
felt this was a good exchange.

The Kit
The Testor release of this kit comes in a three foot long box.
Inside this box are two smaller boxes. One holds the major airframe
components, the other holds most of the details.
The kit is molded in light gray and has raised scribing. A
representation of the interior is provided, but I chose to leave the
interior out of this model. By painting all the windows black (from
the inside) and closing all the entry doors, I built the model in
flight and saved the time and trouble of working on the interior
portions.

Notable in the parts break-down, the fuselage halves are each,
themselves, split in half. The split occurs at the vertical panel
line directly in front of the wing, close to where the propeller
warning stripes are applied. The instructions tell you to build the
rear fuselage and forward fuselage independently from each other,
then attach them together. I learned on my first build of this kit
that this construction sequence does not work well. You are left
with an ugly seam to fix running all the way around the fuselage.
Instead, attach the forward and rear fuselage pieces to each other
before assembling the whole fuselage. This allows you to address the
seam more easily and adjust the fit while you can still manuever the
pieces. It also provides the opportunity to reinforce the joint from
the back side (inside the fuselage). This can be important as the
weight of the model is substantial when completed. Without the
reinforcing, the risk of splitting the fuselage is greater.
Another thing I learned about the construction and painting of the
kit involves the wings. I found it was much easier to leave the
wings off until the end of the project.
I assembled the wings and fuselage independently. I painted,
applied decals, flat coated, and weathered the wings and fuselage
while they were separate. Then, at the end of the project, I
attached the wings and carefully cleaned up the wing seam. The day
of extra care while dealing with the wing seam was much better
(IMHO) than weeks of handling the model with the wings attached.
As this kit was supposed to be for me, I added a lot of extra detail
items to the exterior of the model. Testor left off quite a few
details of the outer airframe. What I added is by far not all of
what is missing, but it was the easier things I could add without
getting too crazy. The additions included the following items:
 |
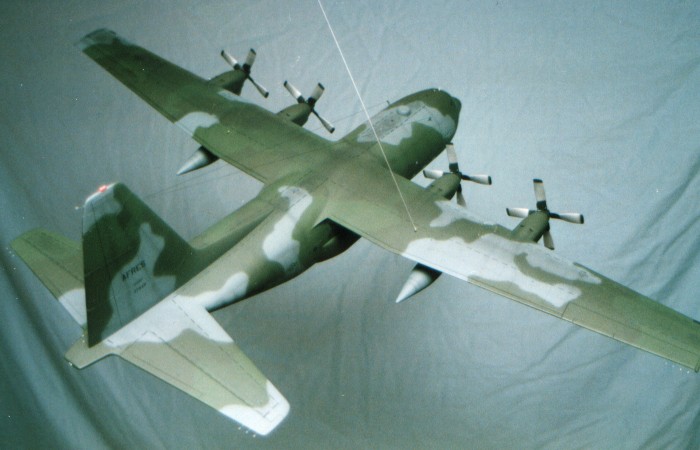
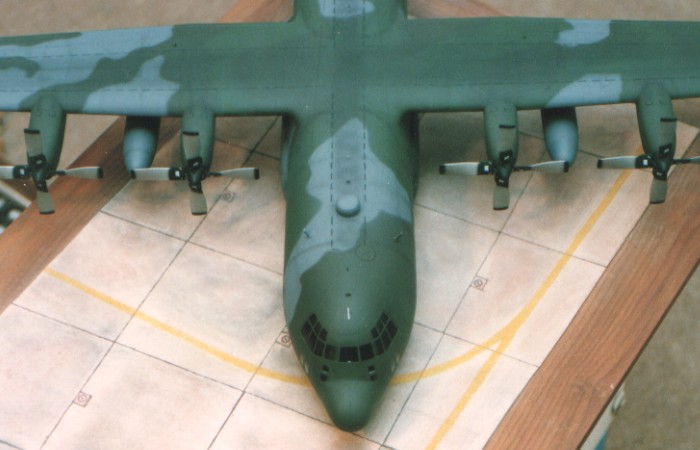
Most prominently, I added the "tophat"
Station Keeping Equipement (SKE) antenna to the upper forward
fuselage. I scratch built this antenna using sheet styrene and a
cross-section piece cut from an F-15 external fuel tank. |
 |
I investigated numerous reference
pictures I had taken to determine all the assorted blade antennae
around the fuselage. I added these from scratch using sheet styrene.
|
 |
There are some external plumbing lines
on the outboard engine nacelles that I added with strip styrene.
I added the red rotating beacon lights under the fuselage and on top
of the tail using laminated sheet styrene that I later painted red.
|
 |
I added the small blue formation
lights to the tops of the wings and fuselage using small platic card
disks the I punched out with my Waldron punch set. |
 |
I added all the static discharger
"whiskers" to the trailing edges of the wings and tail using thin
fishing line inserted into holes I drilled into the trailing edges.
|
 |
I added the line antennae running from
the forward fuselage to the upper tail leading edge.
The last "extra" I did to the model was to incorporate wire eyelets
in the wings and forward fuselage to use as hanging points for the
model. These are visible in the pictures of the model. |

Camouflage and Markings
I used Testors Model Master paints exclusively on this model.
Camouflage is the standard European II scheme (for the C-130)
with Dark Green (F.S.34079), Medium Green (F.S.34102), and Gunship
Gray (F.S.36118). This is similar to the European II scheme applied
to F-4 Phantom IIs only the Phantoms used European Gray (F.S.36081)
as the gray color. Of the two schemes on the C-130, European I and
European II, I prefer the European II scheme better. The "browner"
Dark Green color looks better on the C-130's bulky lines (to me)
than the "bluer" European Green.

For markings, I used the kit decals and added the "AFRES" titles on
the vertical tail so the aircraft could be interpreted as a locally
based 913th Tactical Airlist Group aircraft. To better represent a
local aircraft, I revised the serial number on the tail to be one of
the exact aircraft from the 913th TAG. This touch proved to be my
undoing at being able to keep the model. I was displaying the model
in a local hobby shop (where I worked part-time) when in walked the
crew chief for that exact aircraft. Now, how could I not sell the
model to the crew chief of the aircraft?
For weathering, I used my typical style of thinned down enamel paint
washes and air brush shading. For a more complete discussion of what
I do to weather my models, see my posting on "Weathering Aircraft".
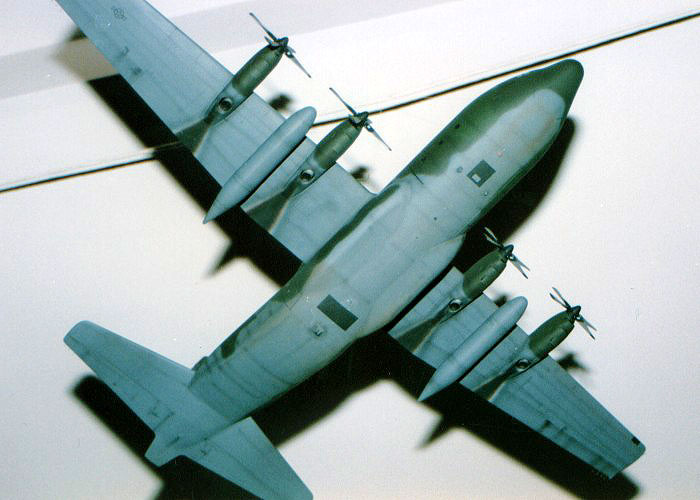
To better represent the look of an aircraft that has just practised
a Low Altitude Parachute Extraction System (LAPES) delivery on a
dirt strip, I did the airbrush shading on the lower fuselage in both
black and several shades of brown and sand. I also used some browns
and sand colors in the engine exhaust stains to enhance their
appearance. The effects of these techniques were quite pleasing. I
followed this with some silver dry-brushing to pop out detailing.


Conclusion
This is a massive kit (over two feet in both length and width),
but it is worth building (assuming you have the space to keep it).
Squirreled away in my attic are one DC-130A, six more C-130E, and
two AC-130A kits waiting their turn to be built. Eventually, I'll
finish one of these that I will be able to keep for myself.