A Hypothetical Scenario...
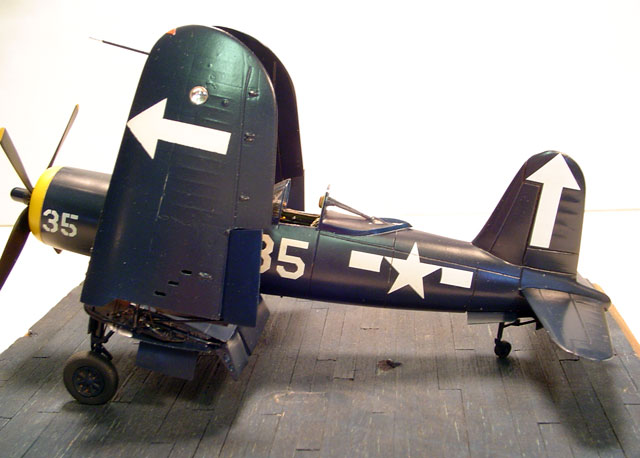
"The Bunker Hill's Revenge"
F2G Super Corsair in 1/48
War Eagle vac/ Otaki F4U-1A
It is May of 1946 and the A-bomb is running behind schedule. With
the invasion of Japan imminent, the Allies are rushing every
available resource to its shores. The Bunker Hill, put out of action
by Kamikazes almost a year before, has been repaired and refitted.
It's steaming back into the fray looking for revenge. This time it
is loaded with the Navy's newest Kamikaze killer, the Vought F2G
Super Corsair.

Construction
The War Eagle vac is an older conversion dating from
the late 80's. It comes with new vac fuselage halves, new vac inner
wing roots, resin intakes for the wings, a resin carborator intake,
a set of resin flaps, a resin 4 bladed prop, a resin engine
(useless- it's an R2800), two superb clear vac canopies, and cast
metal parts for the exhausts,the tail tire covers, and the rollover
bar. It also includes decals that have markings for a couple of test
planes and an early racer. The parts are all very well molded and
require minimal clean-up. Interestingly, it also includes a spare
vac fuselage spine which enables you to do the F1G Corsair; which
was a standard F4U-1A with a bubble canopy (providing you don't
screw up one of the canopies!).

The vac conversion was designed to fit the old 1/48 Otaki F4U-1A
Corsair, which was the best Corsair available at that time. The
Otaki kit is known for it's excellent overall shape, but is less
detailed by comparison to the Hobbycraft, Hasagawa, and Tamiya
Corsair kits now available. The fit of the War eagle parts to the
Otaki kit is "fair". Some parts fit very well while most require a
good amount of test fitting, adjusting, and filler. I used a
combination of super glue/baby powder to assemble the pieces. This
enabled me to get strong bonds, fill gaps, and add structual support
all at the same time. The baby powder not only acts to thicken the
super glue, it also makes it sand out easier; even after 24hrs!
Micro-balloons or talcum powder should work just as well with super
glue.
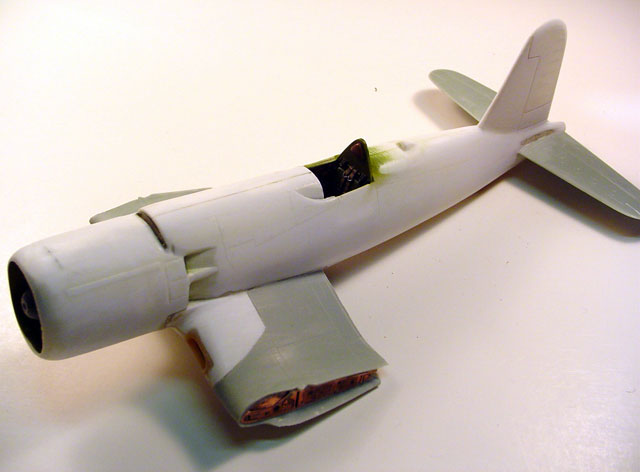
The fuselage was built up first. I had an old
Techniks F-4U-4 resin interior set so I painted it, but held off
adding it until after the fuselage was fully assembled. I also dug
through my near bottomless spare parts box and found 4 banks of 7
cylinder radials, and enough magnitos to build up the R-4360 corncob
engine. I advise you to spare yourself the agony unless you're going
to open up a cowl panel or two; you just can't see more than 2 rows
deep anyway! I designed a rear bulkhead for the engine that would
allow me to add the completed engine into the fuselage after it was
assembled. That made it much easier to finish out the opening for
the cowling with the engine out of the way. I also added sheet and
strip plastic to the rear of the fuselage to build up and detail the
tail wheel well.

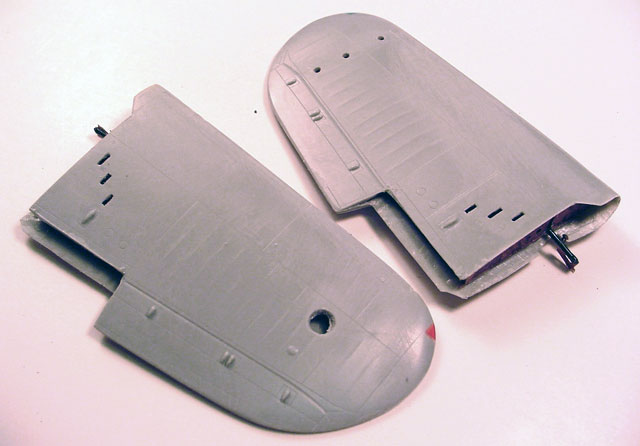
The wings required much more work. This was partly because of the
design and fit of the War Eagle set and partly because I decided to
drop the flaps and fold the wings. The fit of the vac wing parts and
the Otaki wing is the toughest part of the conversion. Also, the
resin wing intakes need to be ground out since they are cast solid.
Still, once the wing root was fully assembled, it fit pretty well to
the vac fuselage. I also cut the wings up because I had a set of
Verlinden PE wing folds left over and also wanted to use the resin
flaps. While I was hacking away at that I went ahead and opened the
shell ejector slots, cut notches in the wingtips for clear plastic
position lights; ground out the landing light, and drilled three
holes for the IFF lights; which would be replicated with MV lenses.

With the vac fuselage and the wing root subassemblies completed, the
hard work was over. The cockpit and engine were added and the wing
root glued into place. The rest of the assembly followed along
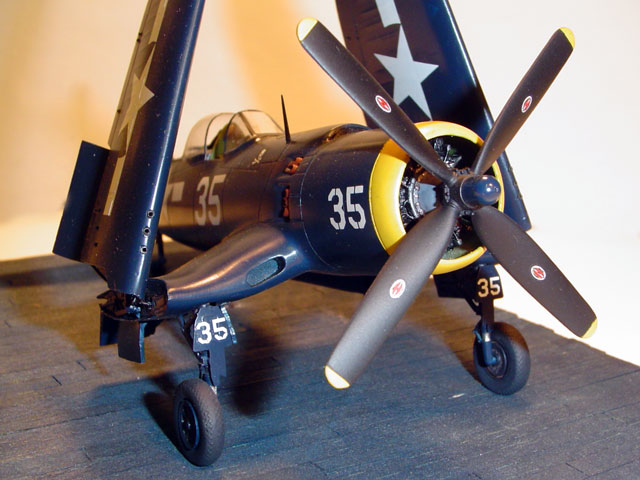
normal lines to complete the model. The slightly warped resin prop
was replaced with a 4 bladed Corsair prop from the spares box. I
also used a set of cast metal Corsair tires I had laying around in
place of the balloon like Otaki tires. Tamiya rattle can very fine
primer White was used to prime the model. It was then rescribed.

Painting and Markings
I decided to skip the test planes and the racing
planes and do a "what if" scheme. Hey if there can be a
Luftwaffe-46; there can be a "Pacific-46"!
I've always like the big white arrows and the yellow
cowls of the Bunker Hill so I opted to show what might have been
typical Super Corsair markings if the war had gone on and the Bunker
Hill had made it back into action. The dark sea blue was made by
mixing up one small bottle of Testor's gloss Dark Blue with 1/4 of a
small bottle of Testor's Gloss Black. It was thinned 50% with
lacquer thinner and 3-4 coats airbrushed on. The lacquer thinner
allows the gloss paint to flow on smoothly yet dry hard in 24hrs.
Also, the more coats you put on, the "blacker" it gets. This allows
you to finish the model in any of the varying shades of DSB you see
evident in photos at the end of WWII. The decals all came from the
spares box. Note that the stars have no blue background. I theorize
that if the war had gone on, Vought would have adopted Grumman's
practice for this in order to save time and money.

Final Assembly
The only fiddly part to the final assembly were the
wing folds. They were designed for the Hasagawa -4 Corsiar so I had
to use some parts and improvise for others. Once those were
complete, the rest of the model was a piece of cake. The only other
items of note were that I replaced the cast metal exhausts with
plastic tubing stubs that I glued together and drilled out plastic
rod for the gun barrels. The last items added were the MV lenses and
the canopy.

Conclusion
This was a fun conversion project.
I actually warmed up by using a Hobbycraft F4U-1A
and the vac spine to build the F1G Corsair. The F2G involved a lot
more work, but now I have 2 rare versions of the Corsair.

If the war had lasted longer, these may have become the definitive
versions of the "Hog Nose". The cut down rear fuselage and extended
cowling make it look a lot sleeker. And, we already know what a
great performer the Corsair was both in WWII and through the Korean
War.
There's no reason to think it wouldn't have wreaked
havoc with the kamakazes. Happy modelin' y'all!